Friday, December 16, 2011

Flashback: 8865 Test Car

Main
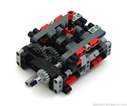
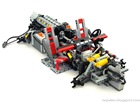
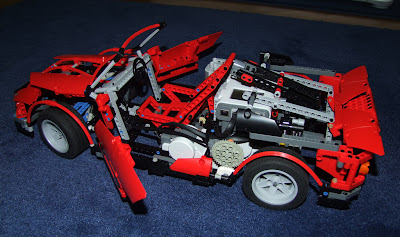
When talking about classic Technic supercars, it's the 8880 which (rightly) usually gets the largest spotlight. However, its predecessor, the 8865 Test Car, was just as advanced and innovative for its time. The one I've built doesn't adhere entirely to the original's colours (some original parts got damaged in those 20+ years), but mechanically it's accurate.

This set was released in 1988 ― of course, deeply in the era of studded beams and brittle toothed connectors. It relies on so many standard parts that it should be fairly simple to build if you've got a good "general" collection of studded Technic, and some special parts such as the front suspension hubs and the old differential can be replaced by their modern equivalents fairly easily. Altogether it's still visibly simpler than the 8880, but curiously, it's a tiny bit longer, wider and higher.
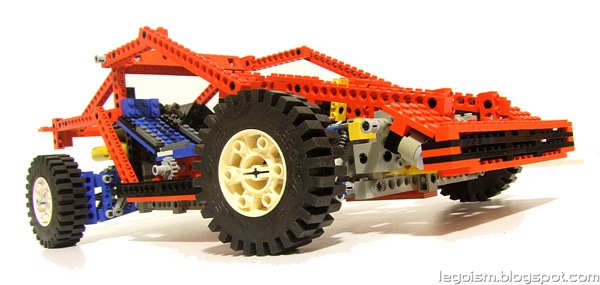
RearLeftBesides the part assortment, one noticeable difference to the modern Technic sets are the instructions. At 892 parts and featuring many complex systems, modern instructions for the 8865 would be spread into two or even three booklets, while the original's consist of just one booklet which isn't too thick (and shares space with the B model). The fact, provable also through other Technic sets from the time, is that the building steps were much more condensed back then, introducing many sub-steps and handling several components simultaneously. Often requiring very careful inspection of drawings to notice the changes.

The features and functionalities the Test Car offers clearly overshadow its own predecessor, the 8860. It has a V4 engine (the first Technic engine with a V layout), built from old large square pistons and using the offset axle holes in the 24T gears to form a crankshaft. It is connected to a linear axle-sliding gearbox with 3 speeds and neutral, which leads to the differential at the back.

Front independent suspension utilizes special parts relying on ball joints to allow steering, and follows the Ackermann geometry. It is based on usual rack & pinion mechanism, linked to the steering wheel in the cabin. The rear double wishbone suspension doesn't use special parts as an "easy way out", but is instead built from standard parts ― mostly beams, pins and plates, with hinge points precisely adjusted with the U-joints' fulcrums. This structure is quite wide, and together with the need to fit the differential on the same axle, it defines the car total width.
FrontRightHeadlights can be also extended and retracted using a lever in the cabin. The lever rotates a simple crank that raises or lowers the (purely decorative) lights. Finally, almost everything can be adjusted regarding the seats: the back and headrest angle with standard hinges, and the front-back position via rack & pinion.
The bodywork composed mainly of 16L and 12L beams is quite basic, especially in comparison to the modern-age Technic models, but it gives a fairly good idea of the overall outline of the car. It's rather sturdy and, together with a strong chassis, makes the 8865 one seriously shockproof model.

Along the lines of the deep-studded era Technic, there's no real static decoration here. As mentioned, even the headlights are moveable, and the engine fan rotates together with the crankshaft.

However, the model isn't entirely flawless. Changing gears is difficult, and usually impossible if the car is static (it was the later 8880 which introduced a smooth synchronized gearbox with dog-rings). The friction of the parts causes quite a strain on the parts in the first gear if extreme caution was not given to allowing slack in the transmission and suspension, or if the engine crankshaft it offset by the tiniest amount.

But altogether, 8865 is undoubtedly among the all-time Technic flagships. It is also a good demo of how much is possible using mostly regular Technic parts and a few well-known mechanisms.

GALLERY
D_Back D_Bottom D_Front D_Side
Gearbox Headlights Engine

GENESIS (Timelapse)

Wednesday, November 9, 2011

Classic Space: 6819 Orbital Shuttle

6819_Orbital_Shuttle_1000Don't bother looking for this one in the official catalogues; it's just a mockup, a graphical exercise of recreating the original Classic Space box arts (which I adore) as accurately as possible. The set number is fake, too ― among many other 68xx sets from the theme, the '19' is missing for some reason.
I've tried to keep the Shuttle more or less within the boundaries set by the Classic Space: blue hull, grey machinery, black and transparent yellow details, very simple and clean form-following-function design, and a prominently displayed Space logo both on the minifig and the craft. It's made of 55 parts, not counting the minifig.

The rest is straightforward. Spaceships are usually photographed from the starboard side at an angle and from slightly above, set against a starry background and above a beige planet surface ― tasks which any half-decent bitmap editing program can do with ease, and the background resources are found in abundance on the Internet.

Though the Classic Space is my favourite of all the Legoland/System themes, I like the Space Police Gen I too, and hope to come up with something interesting from that theme as well ― at least when the 6886 Galactic Peace Keeper arrives via Bricklink, which should provide some useful theme-specific parts.

Saturday, October 29, 2011

Technic TGB Racing Car


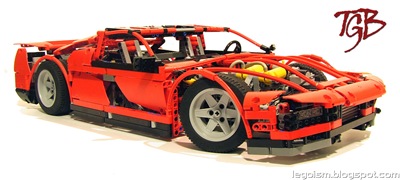
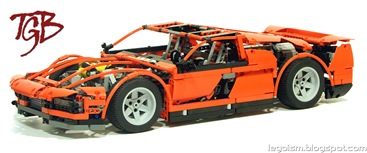
Finally, after several weeks of development frequently interrupted by all sorts of distractions, the TGB is finished. This is the largest Technic car I have built so far. Though not intended as a replica of a real-world car, its component layout and some proportions are very loosely based around the legendary Ferrari 288 GTO ― and hence its name: "TGB" is "GTO" scrambled through ROT-13.
Length: 66 studs
Width: 29 studs (34 including mirrors)
Height: 16.5 studs (bodywork only: 15 studs)
Weight: 2.38 kg
Suspension: Full independent, with front toe-in
Power: PF, 2x Battery pack
Drive: 1x PF XL motor (remote), RWD
Steering: 1x PF M motor (remote) with working steering wheel, Ackermann
Features:
  • V12 mid-mounted engine
  • 6-speed synchronized gearbox
  • pneumatically liftable nose (with motorized pump)
  • handbrake
  • remotely operable headlights
  • remotely moveable rear wing
  • openable spring-loaded bonnet
  • toolbox
Lego-Technic_TGB-Supercar_Show2Obviously, instead of forming the entire bodywork with panels, I've rather opted for the old-school rough contoured approach using beams and a couple of soft-axles. The model is built completely with studless parts, with sole exception being the rear lights that rely on studded transparent cylinders.
The engine and gearbox consist of standard Technic parts for the purpose: cylinder blocks, pistons and cranks in the engine, and three dog-rings (for six gears) moveable with a stick in the familiar H-pattern for the gearbox. At the final stage there is a standard Technic differential. The car is driven by a single PF XL motor connected to the engine crankshaft, but due to large car weight and many transmission components that introduce significant torque, it isn't blindingly fast.
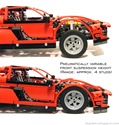
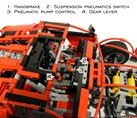
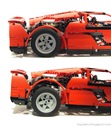
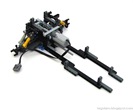
Independent suspension and its rear half-axles are based on parts from the 8070 Super Car, though with "artificially" extended arms to comply to the desired total chassis width and allow the larger moving extents. Height of the front suspension is determined by two parallel pneumatic cylinders that control the total height of the chassis at the front, but due to the compressibility of air, front wheels can still move with a degree of independency ― and the pneumatic cylinders even provide some damping and elasticity. To raise the car nose, the air is pumped into the cylinders with an onboard motorized pump controlled by the levers in the cockpit. Only the compression is required; when the switch is flicked in the opposite direction, the weight of the car lowers the chassis (compresses the cylinders) itself. The rear suspension is rather standard, with only two soft (light grey) springs per wheel. That is intentional: it lets the car sink approximately 3/4 of total spring extents, for a more realistic and low-laid sporty look.
imageSteering is based on a typical rack & pinion system, connected through a clutch gear both to a remotely controlled PF medium motor and a steering wheel. One more control available to the driver is the handbrake, positioned to the left of his seat (just like some old Lamborghinis). There wasn't enough space to cram the brakes into the wheels, so it actually pushes a beam against a small rubber wheel attached to the main driveshaft.
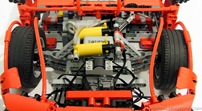
Headlights employ standard PF lights (one pair apiece), and the primary concern around them was ensuring that kilometers of their cables do not interfere with the nearby mechanics (suspension and steering). The rear lights are just decorational, but the wing above them isn't: it can raise about 4 studs from its resting cradle which is flush with the bodywork. It is attached to a pair of beams lifted by a PF medium motor placed under the engine. To prevent the motor from stalling when the wing reaches its end positions, a variant of Sariel's 6x1x1 clutch is used.
Lego-Technic_TGB-Supercar_Show1Along with drive and steering motors, headlights and the rear wing occupy four available remote control receiver ports, while the suspension pneumatic pump can be operated only locally, through the cockpit levers. The power is provided by two PF battery packs ahead of the rear wheels, to spread the thirsty motors' consumption a bit.
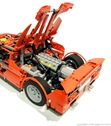
As one would expect, the bonnet can be opened to expose the engine and ease the way to the PF batteries, and is spring-loaded in both directions to keep it either firmly shut, or open. Finally, just behind the rear left wheel is a tiny gimmick - an openable compartment with two System-type wrenches.
Despite it incurring some mechanical compromises, I've managed to keep the chassis bottom completely flat (without any protruding studs or gears), the weight distribution close to 50/50 (in fact, it's 48F/52R, but I can live with that), and reasonably small turning circle.  Also perhaps worth noting is a little bit of toe-in on the front wheels.
In general, I am mildly satisfied with how the car turned out, but still I find some of its segments less successful. Here's what should, in my opinion, have been better:
    Lego-Technic_TGB-Supercar_Show4
  • Bodywork design. I've never had a surplus of designer or visual art talent. Having changed and re-changed it several times, I've half-heartedly settled on this final bodywork visible on the photos, but I'm still convinced it could be significanly better.
  • Pneumatic pump. It is awkwardly placed and based on an XL motor far too cumbersome for the task. As it was one of the final components, by then I've had no alternative regarding these two parameters, but really it should have been considered in more detail during the planning stage.
  • Chassis strength. Despite relying on well-pinned four beams throughout the most of its length, the chassis still bends a few millimeters under the car weight. The roof should have been given a structurally more important role.
  • Gearbox dimensions. Being 7 studs wide, the gearbox pushed the seats far too wide apart. Future designs should perhaps place it somewhere in the engine bay, and have it controlled from the cabin with control axles or even flex system.
These remarks will serve as guidelines for the next Technic car. Other features I'm considering, which this car lacks, are power steering, automatic or sequential gearbox, a full set of disc brakes that also engage the brake lights at the rear, and suspension with (perhaps adjustable?) camber.
Basic views
Lego-Technic_TGB-Supercar_Const-Back Lego-Technic_TGB-Supercar_Const-Bottom Lego-Technic_TGB-Supercar_Const-Front Lego-Technic_TGB-Supercar_Const-SideLego-Technic_TGB-Supercar_Const-Top 
Details
Lego-Technic_TGB-Supercar_Func-Bonnet Lego-Technic_TGB-Supercar_Func-Brake Lego-Technic_TGB-Supercar_Func-FrontSuspension Lego-Technic_TGB-Supercar_Func-Headlights Lego-Technic_TGB-Supercar_Func-Levers Lego-Technic_TGB-Supercar_Func-Nose Lego-Technic_TGB-Supercar_Func-RearSuspension Lego-Technic_TGB-Supercar_Func-Wing
Genesis
Lego-Technic_TGB-Supercar_Progression1 Lego-Technic_TGB-Supercar_Progression2 Lego-Technic_TGB-Supercar_Progression3 Lego-Technic_TGB-Supercar_Progression4 Lego-Technic_TGB-Supercar_Progression5 image image
Video

Saturday, October 15, 2011

Unsolved (or at least not elegantly solved) problem: Power steering

Excuses for a lengthy delay ― a bit of holidays (and then catching up with lots of work meanwhile accumulated) interrupted the posting routine. While I'm toying with a Lego project for which I hope to put a text together in near future, I got intrigued by a problem of simple yet effective Technic power steering.

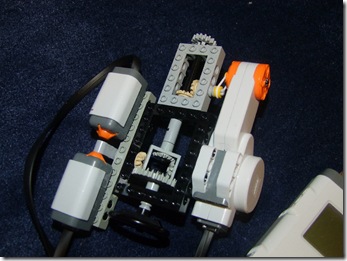
Sounds simple on the surface, doesn't it? Attach some kind of force meter (probably a differential with a spring) between the rack's pinion and the steering wheel, power the axle with a motor if a given threshold of force is exceeded, and you've got your power steering. Looking something like this (here implemented with NXT rather than Power Functions, but the working principle is the same):

powersteering

So, as you can see, an arm sufficiently tilted by a differential when the force between the pinion (at the top) and the steering wheel (bottom) becomes large enough, will push on one of the mechanical sensors, depending on the rotation direction. The motor will start spinning accordingly and thus assisting the steering wheel, as long as there is force between the pinion and the steering wheel. When it's gone, the arm will return to the neutral position between the sensors and the motor will interject no longer.

In its basic principle, this does work as a power steering ― it will assist in rotating the pinion against significant resistance, and not activate unless the pinion is resisting the motion set by the steering wheel, or vice versa. Yippee, problem solved, and we can return to playing Portal 2.

No, not really. The trouble is that this sort of system doesn't even remotely provide the continuous and soft feel which it should. It works far too jerky: once the motor threshold is reached, its abrupt intrusion easily turns (and over-turns) the steering wheel and the pinion in the desired direction, releases the arm, and stops. Nothing like the smooth operation found in real cars.

The basic problem here is in the binary operation of the motors and sensors. It can either be on and off, while a smoothly working power steering should have a range of intermediate levels, keeping the motor force proportional to the wheel-pinion tension, and yet sensitive enough to start at low thresholds.

One method could rely on a gradient colour disk being spun according to the tension instead of a pusher arm, which is in turn scanned by an NXT colour sensor. It could determine the force with greater precision and thus run the NXT motor with different power, as required. But this approach would be unacceptably complicated and cumbersome, especially if we confine the project only to standard Lego parts ― in which case building the gradient colour disk would be even more complicated. After all, this system should easily fit in the front of a medium-sized Technic car (say, 8070), and yet keep enough room for the steering, suspension, etc.

Ideas? Post them in the comments if you've got any. If I come up with something, I'll add an update :)

Saturday, August 6, 2011

Lego Technic 8258 Crane Truck Review: Drive, Tow, Lift, Tilt, Repeat

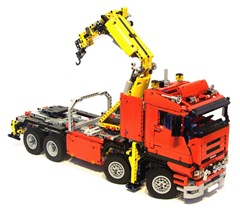
Among all the dust being (rightfully) spread these days around the massive new Unimog, it's difficult to focus on other Technic trucks. But I will actually do a little flashback and take a look at the slightly older, but not much less fascinating 8258, which I've had my sights on for some time already.

Lego-8258-Truck-Review-Main

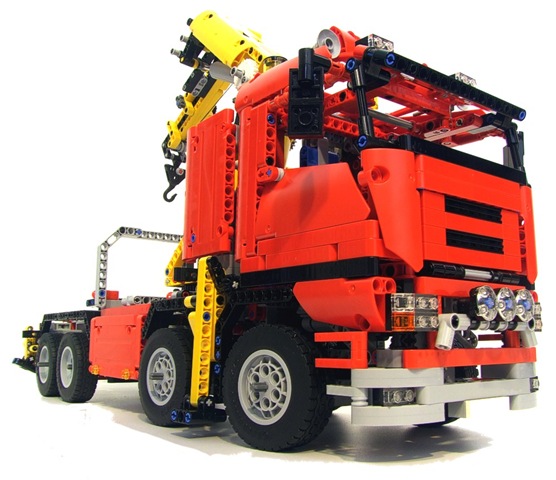
Huge, at over 3,5 kg and 1877 parts (only a few percent less than Unimog's 2035 and at the same level as the 8421), it is undoubtedly among the flagships. And as you would imagine, almost two thousand parts imply quite a lot of functionality cramped in the generous volume a truck offers. Just like most real-world trucks, its cabin tilts to reveal an engine ― a V8 in this case, connected to the 3rd pair of wheels. Two front wheel pairs are steered (the front pair steering more than the 2nd, just as it should) through a HoG cylinder on the top. The cabin is just decorational, there's unfortunately not much to control about it, beside adjustable mirrors.

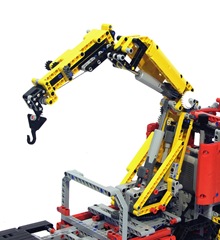
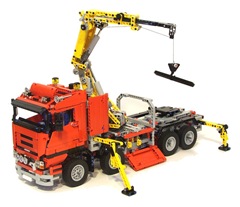
Lego-8258-Truck-Review-Closed But again, the crane is a masterpiece of Lego engineering. It can be rotated and its two arms independently tilted, all with a XL motor, two large linear actuators and a couple of gearbox parts. Thanks to a clever coaxial drive inside the turntable, relying on transmission rings and extenders, the crane can rotate without limits in either direction. Great design ― tight and efficient. The last arm of the crane can be extended, and the rope with a hook spooled manually; controlling even those functions with a motor in the chassis would be just too much. A manual ratchet locks the rope and prevents it to unwind under heavy load. The fourth function of the motor is to extend or retract two pairs of outriggers ― their ends are manually opened or closed, and have quite a reach and enough sturdiness to carry the entire vehicle and its load. And it's worth mentioning that the battery pack is very easily replaced; one does not need to break open half of the bodywork.

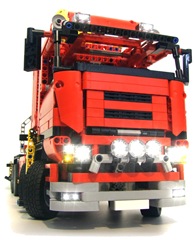
Looks are "standard" for this class of models: nicely shaped contours using the panels and Technic plates, with a few details such as the exhaust pipe, lights and horns. Just sufficient not to obscure the mechanics inside, but altogether, well judged.

Lego-8258-Truck-Review-Crane Mechanically, it's brilliant and a great lesson (especially the complex crane), but actually not devoid of flaws. I've found two; neither of them is too critical, but they need to be addressed. First, the steering system could have been a bit stronger, or been geared down a bit more. It is easy to steer while driving the truck, but while stationary it puts parts under some strain, as there are four large tyres to rotate, all very grippy under the weight of the truck. Second and more important, despite the truck having three clutch gears to prevent damage when the movements get blocked, it is not always on them that the system gives: often some other gear will skip and crackle, opening the way for some gear wear. Perhaps the final stages are just geared down a tiny bit too much.

But regardless, if you're asking me whether this is a good value for money, it certainly is. It's not the Unimog, but it offers almost just as much, while it can be found today for significantly lower price. Especially if you're aiming at building material, and not just the excitement of having something that came fresh from the factory.

▪ BUILDING, IDEAS AND CONCEPTS

As said, the mechanical ideas (especially the coaxial drives in the base of the crane) are great, and something one should add to his lexicon of Lego tricks. And, predictably, it's not the easiest to build: often you will connect large modules in a delicate way, have to synchronize gears, find the choreography to fit one part inside the other, etc. Nothing scary, especially if you're experienced, but it requires some patience (in my case, about 6 and a half hours of patience).

Lego-8258-Truck-Review-LightsOn Besides, the parts structure of 8258 is somewhat... unusual. Some typical Technic parts are used very scarcely, which probably reflect Uwe Wabra's building style and preference (he designed the model). For instance, there are unusually few half-width beams, and lots of linear actuator holders that are employed for something else instead. Inconventional, but effective ― and that's what counts, after all.

▪ PARTS SUPPLY

What needs to be said after the starter fact that it's got slightly shy of 2000 parts? Tons, tons and megatons of standard Technic building material in red, black, yellow and grey, including some valuable parts: PF battery pack, switch and XL motor, eight nice truck wheels, three clutch gears, and two large linear actuators. Also the panels, triangular, round and flat, are particularly useful. As mentioned before, some classes of parts are almost missing, but that doesn't mean this is not a good addition to your inventory.

▪ EXPANSIONS

Absolutely. It is a great modular platform, and could be easily rebuild to accomodate some other machinery instead of the crane, redesign the cabin or add a full-size trailer. The power pack is there, so there could be some more power functions added, and even converting it into a car-transporter or something of the kind shouldn't be a problem.

Lego-8258-Truck-Review-Opened ▪ GENERAL PROS & CONS

+ Tons of building material
+ Good value for money today (it's sliiiightly older already)
+ Clever construction
+ Fun to play with
+ Power functions

- Difficult to build
- Clutch gears don't always protect from skipping
- Steering could be more geared down

▪▪ VERDICT ▪▪

A typical Lego Technic flagship ― huge, with lots of functions, great to play with, sturdy and mechanically clever, and providing a good assortment of parts. It's not flawless, but still is seriously good, and among the best role models to get your hands on if you're into building trucks. At least grey or red ones. :)

Lego-8258-Truck-Review-Bottom  Lego-8258-Truck-Review-Engine  Lego-8258-Truck-Review-Parts

Legoism reskinned

As you may have noticed, the dark-themed Legoism is no more. The reason is not that I got bored of it or have ended some depressive period in my life, but that it should be more eye-friendly to the photos with the white background I'll try to make for the new posts. It should look cleaner, and now that Sariel has published a comprehensive photo processing tutorial for exactly the purpose, I've got no more excuses to stick with the 1990's web look (the only thing that was missing was an animated GIF of fireworks).

By the way, this is just the first step of the face-lift; the second one, coming up shortly, will change all of the fonts used in the blog to Comic Sans.

On an unrelated note, some minor additions to Technic Tips have been done.

Monday, August 1, 2011

Iridium: Simple file-based sequential NXT motor control

After a bit of typical Summer-induced inactivity for which I beg pardon, here is something possibly useful for the NXT fans.

First of all, a bit of introduction to the problem wouldn't harm. NXT smart brick is a great device, but its architecture and software imply some limits. For many implementations, those limits are completely irrelevant, but in some special cases they can become a nuisance. One of them is inconvenience and inefficiency of creating long sequences of independent motor moves within the NXT-G programming platform, and difficulty of creating them automatically. There are certain tricks that can help, such as flashing the firmware with custom code, Bluetooth-mailbox instruction systems, but these are usually cumbersome and require a lot of hassle for just a simple task.

Therefore, there is some space for a solution in between. Take, for example, a plotter: if manually aligned, in its simplest implementation it requires no sensors neither any logic structure; all that is required is to move motors in a specific, but rather long controlled sequence. Far too long to create (or even worse, debug) directly within NXT-G, but still too simple for many to go through the battle with firmwares, messaging, etc.

So I've opted to make a simple file-based solution. Create a file with lots of numbers and upload it on the device, then have an NXT program read it and move the motors accordingly. Don't let me be misunderstood: this is not a workaround or even something completely new in the NXT sphere - all these functions are normally supported by NXT (i.e. NXT-G supports reading raw, linebreak separated numbers from a text file). This is just an example of implementing them for the purpose in question.

The file structure is really easy to understand. It consists of successive number pairs, with the first one always indicating the type of instruction, and the second being the "value" of the said instruction. Specifically, instruction types 1, 2 and 3 refer to moving the three motors, for a value that follows them. In other words, a sequence "1, 45, 2, -360" will rotate the first motor 45° in positive direction, and then rotate the second motor one full circle in negative direction.

Obviously, this sequence can continue as long as the NXT brick's internal memory allows which, taking in account the storage requirements per instruction, can extend to 10000 or even more instructions, probably more than its batteries and owner's patience can last anyway.

Besides the motor movement instructions, there are some others that may prove useful: number 11 followed by a number between 1 and 100 will set the motor power of all the upcoming movements to that value (that is, all until the next number 11 instruction). Likewise, number pairs 12, 0 and 12, 1 will choose whether the system will proceed or, respectively, wait for the current instruction to finish before executing the next. Number 13 followed by a number allows to set amount of milliseconds to wait between each instruction.

Finally, when encountering instruction 0, the sequence will terminate. If it was followed by a 1, it will also play a sound to notify the user.

As you can see, despite offering no real logic or dependency on sensors, this is a rather simple way to automate many successive motor movements. Such files can be very easily edited on any computer with a simple text editor, or automatically created by some software or using a dedicated library (I'm working on one for my favourite language - Python). It can even be automated further, using e.g. an external software such as NeXTTool by John Hansen to upload the instruction file to the NXT and run it, allowing the user to control everything from the computer, at least if it is all right to have the NXT connected to the computer all the time.

Here you can download (File > Download original) the .RBT and .RXE file for NXT and a sample instruction file. It must always be Iridium.txt, unless you're ready to slightly modify the RBT file.

If you like it, and find some cool usage for it, I'd be glad if you would drop a link or a description in the comments. Have fun!

(One final note, if you are interested, the name of this project has nothing to do with LEGO. It is just a coincidence I have had a periodic table on my desk at the time I started making it, and one minifig was standing on the Iridium's box.)

Friday, July 1, 2011

Truly horrible Technic supercar failure

EDIT: Forget about this failed experiment. Meanwhile I've built a racing car more worthy reading an article about - click here.

Being fascinated by supercars both in the Technic sphere and in the real world, it was about time I started building another one. Unfortunately, the fascination itself is by no means sufficient to build a good Technic supercar, as is easily demonstrated by this terrible failure - probably the worst MOC I've done for quite some time. Despite it being awful, I've at least decided to document it here as it may help other builders to avoid all classic sevety-six mistakes I've done designing it.


It's powered by NXT electrics: one motor provides the drive to the rear wheels, other handles the steering, and the third flicks a PF switch to turn on the lights, to avoid requiring more than one remote control. It also has full independent suspension based on the parts from the 8070 Supercar, which works nicely. The doors are openable manually, and the steering wheel works as well.

So, you can already notice how scarce it is with functionality: good builders can easily cram infinitely more stuff into a car of this size (69x29 studs footprint). It is a consequence of my anomalous obsession with as strong and ideally weight-distributed chassis as possible, leaving very little possibility to change the components layout later. In other words, I've done a mistake by treating a chassis as a local problem, which it certainly isn't in a supercar that has to use every cubic centimeter of space wisely and well-coordinated with other components. Of course, the chassis thus limited the scope of possibilities regarding the bodywork. That's why there are large pointless empty areas within the bodywork (especially right behind the nose and under the rear wing). The chassis could have been reworked, but I've decided rather to keep it and keep the intelligent approach for the next car.

I'm not satisfied with the looks either. While the rear could be acceptable, the engine cover is rudimentary, the doors are too small and long, the windshield and the seat are out of proportion, and the whole nose of the car is a bit too small (looks like an old VW Beetle somewhat), and ugly. Again, I have not had a sufficiently clear vision of what should the car look like when finished, and it shows.


A point of interest is perhaps the steering which bases the inner points of the asymmetric ball-jointed control rods on a rotating beam for a very pronounced Ackermann geometry. The beam is rotated by a worm gear producing some backlash, but on the other hand, providing also sufficient torque to turn those grippy tyres accurately. Also I don't find the seat design bad (though it is too large), and it could be perhaps used as a base for some future large-scale projects.

But other than that, this is just an oversized, ugly, fragile and slow wheelie bin with functionalities on a level of a 8090 set car. But it prooves the point which, ironically, I've already written in the Technic building tips and have now violated: for a tight and difficult machine such as a supercar, you really need a clear vision of what exactly are you going to build, before you even pick the first brick up.


I sincerely hope the next one will be better, to appease the Gods of Lego, though I may need to rehabilitate on Classic Space for a while.